Its probably not obvious, but my bench was inspired by Bob and David Key's Good, Fast, and Cheap Bench. Bob's case for building something quick now to get you going, then build you dream bench later made a lot of sense to me. The fact it took David just 15 hours to make it sounded pretty good to me too. However the design as it was didn't suit my available skills, tools and materials so I changed a few things and made a lot of quality over time choices along the way. I should have known, my projects always take a magnitude of order long than I expect. I spent at least 70 hours in it, perhaps double that. At least it looks OK and I did get a good workout out of it. Its going to have to be my dream bench I think, I doubt I'll ever have the drive to build something significantly fancier than this. Of course I do have this entire sheoak tree and some vices kicking around....
It may not have been quick, but it did meet my low cost goals. Total cost for the bench excluding vice hardware was about $95 (US$52). A bit over half of that was for wood, the rest for finish, screws, bolts and nuts. All the solid timer is from used rough sawn jarrah and karri I've scavenged for free from various sources. The base for tool tray is a jarrah veneered particleboard off cut. The top is hardboard (Masonite) from the hardware store. The rest of the materials came from my local salvage and surplus yard.
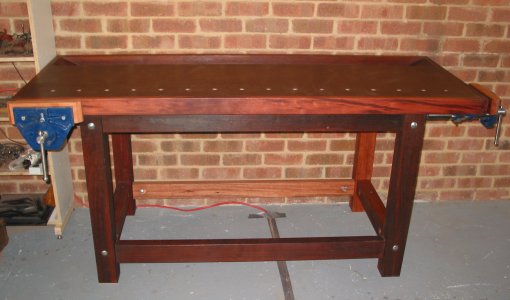
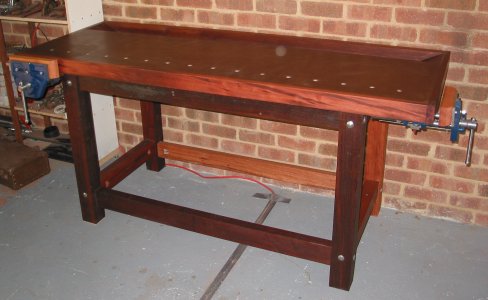
The bench weighs in at a healthy 160kg (350 lb). Seeing the weight of some other benches around, I was a little skeptical of my measurements. But no, come time to move it into position I found it is in fact damn heavy. I did much of the work on the top with it sitting on the base. I'd like to say it was some clever plan to avoid having to move the heavy completed top into position but it had a lot more to do with the fact all my other surfaces were buried with clutter. During construction the top needed to be flipped many times and more than once I came close dumping the lot on the floor.
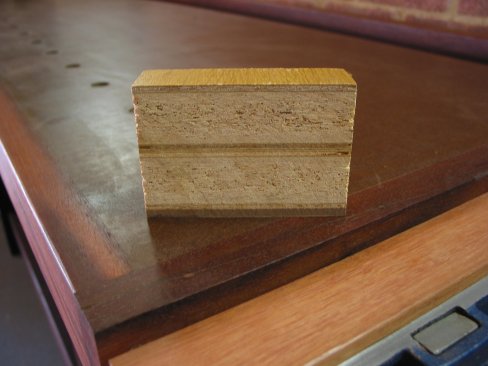
In would have preferred a solid wood top. However I didn't have a jointer plane when I started and I didn't know how to use one. At the time I didn't have enough solid lumber to make a top either. So I went with a top made of sandwiched man-made materials. My local salvage yard had these large panels which I think were used as office walls. They were made of 30mm (1 1/4") particle board faced with 3mm (1/8") red oak veneered plywood on either side. The panels where 2m x 1m (6'8 x 3'4), so I cut one in half, sandwiched the pieces together and topped it with hardboard. The rest of the bench dimensions were based around the size of this piece. You can see the cross section of this rather odd sandwich above. I made a large screw up here - I used regular instead of tempered hardboard so the top surface is quite soft. The sandwich is edged with jarrah and each corner is pinned with two 1/2" dowels.
I had mistakenly assumed the sandwich method would be easier and faster than a solid top. Noooo. Gluing up the sandwich isn't too hard, except you have to find a way to keep it flat and clamp it together. I had just finished my wood rack and I'd leveled the shelves with a string line. I stacked it up on a shelf and weighed it down with some large paving slabs. It nearly worked but paving slabs aren't nearly flat and one corner of the sandwich didn't get any pressure. The whole thing is flat to within 1mm (1/64") except for one corner that droops a bit. I put the droop on the back right hand side. Edging a bench is a lot more complicated than typical projects. The flush trimming bit in the router doesn't work too well across the voids for the tool tray or rear vice jaws. I ended up doing some hand planing after all.
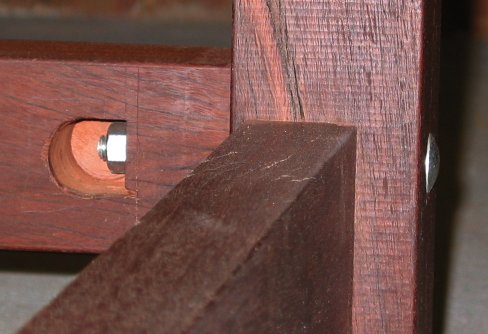
In building the base, I was a bit paranoid about racking. The whole point was that it be solid so I decided to tenon the stretchers into the legs and bolt it together for good measure. To ensure tight fitting tenons, I cut them with a hand held router and clamp on jig. The mortises were done with a template and suitable collar in the router, then squared up with a chisel. This took a long time, lengthened by the fact the timber for the stretchers aren't all the same size. A 6" long 1/2" carriage bolt goes through each joint and a nut and washer is affixed via the D-shaped hole. The hole was made with a 35mm European hinge Forstner bit, then 2 corners squared off with a chisel. It was pretty tight getting a spanner (wrench) in there - I had to grind the head of a ring spanner thinner. You can't see it, but there is a middle stretcher across the top which didn't leave enough room to swing the spanner, so I also had to shorten it. (Sorry dad, I'll buy you a new spanner soon).
I cheaped out of the vice hardware and bought Record quick release knockoffs. I'm sure the genuine Record ones are much nicer, but the price was right and they do the job. The have the usual cheap rubbish issues: rough machining, the faces aren't square (which you compensate for with the wooden cheeks) and paint that rubs off with a rag (or your work if you're careless). They do have one annoying defect in use: after using the quick release, the half nut often doesn't reengage the screw properly. You'll be tightening down on something, then *pop*, the vice loosens off a bit as the nut slips properly into the thread. I'm kind of hoping they get better as the threads wear in. I assume Records don't do this, so springing for genuine is probably wise. The end vice is a 7", the front is 9". I would have used a 10 1/2" if they had such a clone available. That said, the 9" holds work very well.
For the finish, I didn't care much as long as it was quick. I've read good things on the net about modern tung oil based products, so I figured this would be a good time to try it. The only product I could find here was ArborOil. The specs don't actually say its tung oil based, but it sounds like it probably is. As claimed, its quick and easy to apply, fast drying, non-darkening and appears to be quite tough. It is much more forgiving than polyurethane, in particular a bit of sawdust or errant mosquito getting on the wet finish gives me no reason to swear. Dings don't seem to be as ugly as with some other finishes and I assume they are easily repairable. The biggest down side is the price - a litre costs about as much as 2 litres of polyurethane. The wax it contains often dries uneven and patchy, but I expect that could be buffed out if I knew what I was doing. All said, I'm sure I'll be using it a lot from now on. Now, what to do with that 4 litres of urethane I've still got.
Some time down the road I plan on making a low cabinet to sit between the stretchers. In addition to some storage, this will give me an under bench shelf that I think will be very handy.
Lessons learned and tips for others: