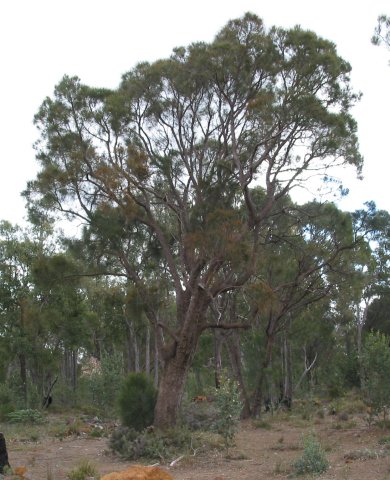
Many years ago my father dragged home a large WA sheoak log, quartered it with a chainsaw and left it to dry. Its been lying around in the weather for over 10 years. I recently purchased a chainsaw mill and the first thing we did was mill up that sheoak log.

This is a typical sheoak tree. Its around 300mm (1') in diameter, not straight and branches early. Our tree was about as good as they come - around 600mm (2') in diameter and straight for 2m (6 1/2') before branching. When cut it had been dead for some time.
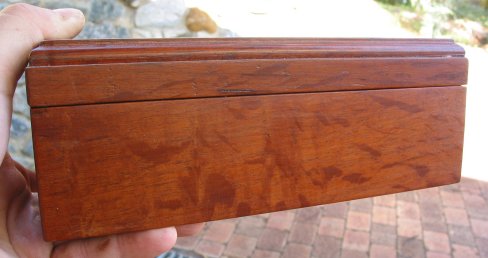
The above box is made of sheoak. It was made by my wife's late grandfather from a small piece of the log we gave him. Its not actually a very good sample of the timber - for some reason it looks "dirty", the pores of the timber are black. Typically the wood isn't like this and other samples I've planed back from the log look "clean".
The reason for the name should be obvious, the strong medullar rays that look similar to those of oak. Neither the tree nor the wood grain look anything like oak. I suppose the colour is kind of close, in that its a lot closer than say, blue wood. The physical properties are interesting. Its a little less dense than your typical Australian hardwood and rates unremarkably on the various strength tests. However it does excel in two areas. The first is its extremely stable. Supposedly T/R shrinkage of 1.7/1.0% for commercially dried lumber. For those that don't know, you want those numbers to be as small as possible, and if not small, then at least close to each other as this reduces the tendency for the wood to warp in use. Oak has T/R shrinkage values of around 7/4% which is the ballpark most furniture woods are in. The other interesting property is that, despite not being particularly strong, it is very hard. Hard to cut, hard to sand. Power tools bog down on it. Running a board across a jointer is an experience in itself. The impact of the knives hitting the timber makes the process uncomfortable and noisy and results in a heavily scalloped surface. Sharp hand tools work surprisingly well on it, except of course you have to work so much harder than normal to do the same job. Sanding is particularly tedious, it takes a long, long time to sand off the marks from the previous grit of paper. The result however is a wonderful glassy smooth surface.
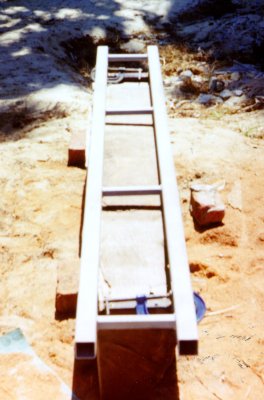
Anyway, on to the milling. Here you can see a quarter of the log set up for the first cut. The log is propped up with bricks. A chainsaw mill requires a flat reference surface to make the first cut. For subsequent cuts, the previous cut acts as the reference surface. If you're first cut isn't straight, the rest will be bad also. The obvious choice is to use a straight, rigid board. As we soon found out, unless you have a 12" jointer handy, such things don't exist. We tried a cut with the best board we could find but the result wasn't gratifying. I have a friend who was a welder for a fabrication company. I asked him to weld up the "ladder" shown. No worries he says, then 2 days later phones up and said he's decided to change careers and has quit his job. Oh no, now what? Fortunately he had an ex work mate do it for him. Thanks Peter (and anonymous mate), by eye its perfect.
Its hard to see in the picture how the ladder is fixed to the log. On each end of the log there are two small brackets, shimmed to be parallel with each other, and then screwed on with TEK screws. The ladder is then clamped to the brackets with G clamps.
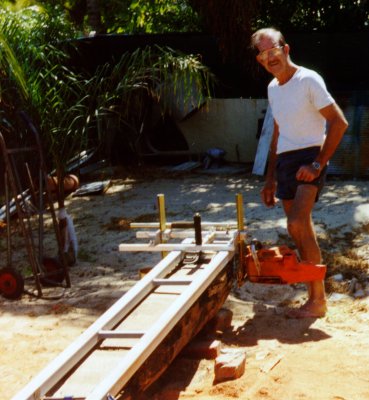
Here's dad ready to make the first cut. The design of the mill is really just a simple (but ingenious) copying jig. The silver coloured horizontal piece rides along the reference surface (our ladder). Two gold coloured vertical pieces go down to hold the chainsaw bar parallel. The gold pieces are adjustable up and down to allow varied depth of cut. I was originally looking at purchasing Granberg's Alaskan mill. However for the same price I bought a near identical product from a local Perth company, Westford. My choice was basically one of support - Westford sell upgrades and accessories and I can just drive over and buy them.
Dad's Husqvarna 50 chainsaw is a bit under the recommended minimum size for the mill (65cc is recommended). To get as much cutting width as we could we put on the maximum recommended length of bar for the saw (20") and put the motor side mount very close to the motor. This latter move interferes with the height adjustment of the mill so the thinnest possible cut (without the ladder) is just over 3 inches. Conveniently, this happens to be maximum depth of cut for my table saw.
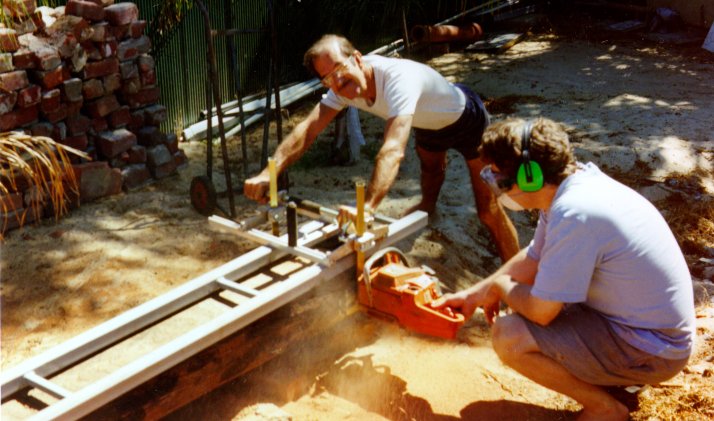
Here we are making the first cut. One person can operate the mill with one hand on the mill, the other on the saw throttle. However I think I mentioned that sheoak is hard. The saw bounces back off the wood as it cuts and its easier to keep the mill under control with two hands on it. With a sharp chain (sharpened to a proper rip profile), things went quite well. Occasionally a tooth would dig in and jam the chain, but all in all quite amazing considering how hard we were pushing the saw. The "Little Saw that Could".
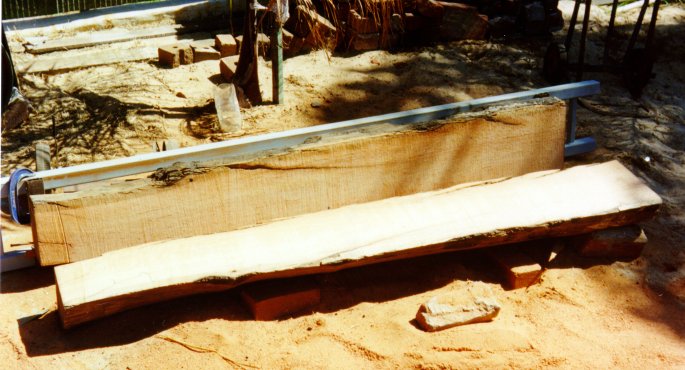
Here is the result of the first cut. It was very sunny that day - the appearance of the wood is darker and more orange looking than the photo would suggest. You can see some very large cracks coming in from the outside edge. Presumably these had started to form while the tree was standing dead. Still, there is plenty of good wood in there and I managed to locate a long clean section suitable for the side stretchers of a bed. You can also see on the left hand end a deep chainsaw mark where the wood fell onto the saw at the end of the cut. In subsequent cuts we reduced this with carefully placed wedges. The rest of the cut is quite consistent and clean. The cut is flat to within around 3mm (1/8").
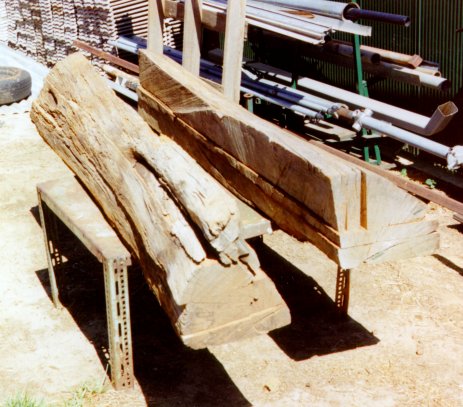
Here's half the tree sawn up ready to go. Since the kerf of the chainsaw is so large, I decided I'd resaw further with either my table saw or a bandsaw to reduce waste. Now I just need a whole lot of time to turn it into some mission furniture.